Welcome Home - Laundry Room


Welcome back! If you’re a mom you will understand when I say that this is a room I spend more time in than I care to admit. Laundry has slowed down slightly since we’ve been spending more time at home however between the 4 of us I still visit the laundry room daily, grrrr. This room wasn’t TERRIBLE to start, but like the rest of the house it was just so, TAN. And that was not working for me. Originally I thought that painting it would do the trick, and it honestly did make a big difference. This is actually the room that I get asked the most paint questions on, so here it is: we used Sherwin Williams SuperPaint in the color “Peppercorn”. Since this room is off the kitchen, I wanted it to contrast it. The kitchen is very light as you saw from my last post so I thought going with a deeper color would fit perfectly.
If you follow me on Instagram, you probably participated on a million polls that I did while trying to figure out what I wanted to do with the floors. I was split between doing a fun tile print and running the LVP all the way through from the kitchen. After going back and forth for a week, John convinced me to keep the floor the same in both rooms. I’m so glad he did because it gives such a nice seamless transition. With that debate settled, I ran into my next issue….
The laundry room used to have two closets - a pantry and a large closet with a lot of shelving. While this seems like a great idea, I knew that the larger closet was unnecessary for us. When we first bought the house I had planned on converting into a small mud room area, however after a few months of living here I realized that wouldn’t serve much of a purpose since we very rarely use the back door. So I turned to my best friend, Pinterest. I saw so many great laundry rooms that had built in open shelves with a table on top to fold laundry on. So, my next idea was born! I kind of sprung this on John since we weren’t even actually planning on knocking out that closet at the time. But I convinced him by telling him that if we didn’t do it now, we would have to replace and figure out the floor situation when we did decide on it. Since he was on a high from knocking out the kitchen/dining room wall, it wasn’t too difficult to persuade him. So, he and Jax knocked the walls down and rebuilt everything so that it was all one open area.
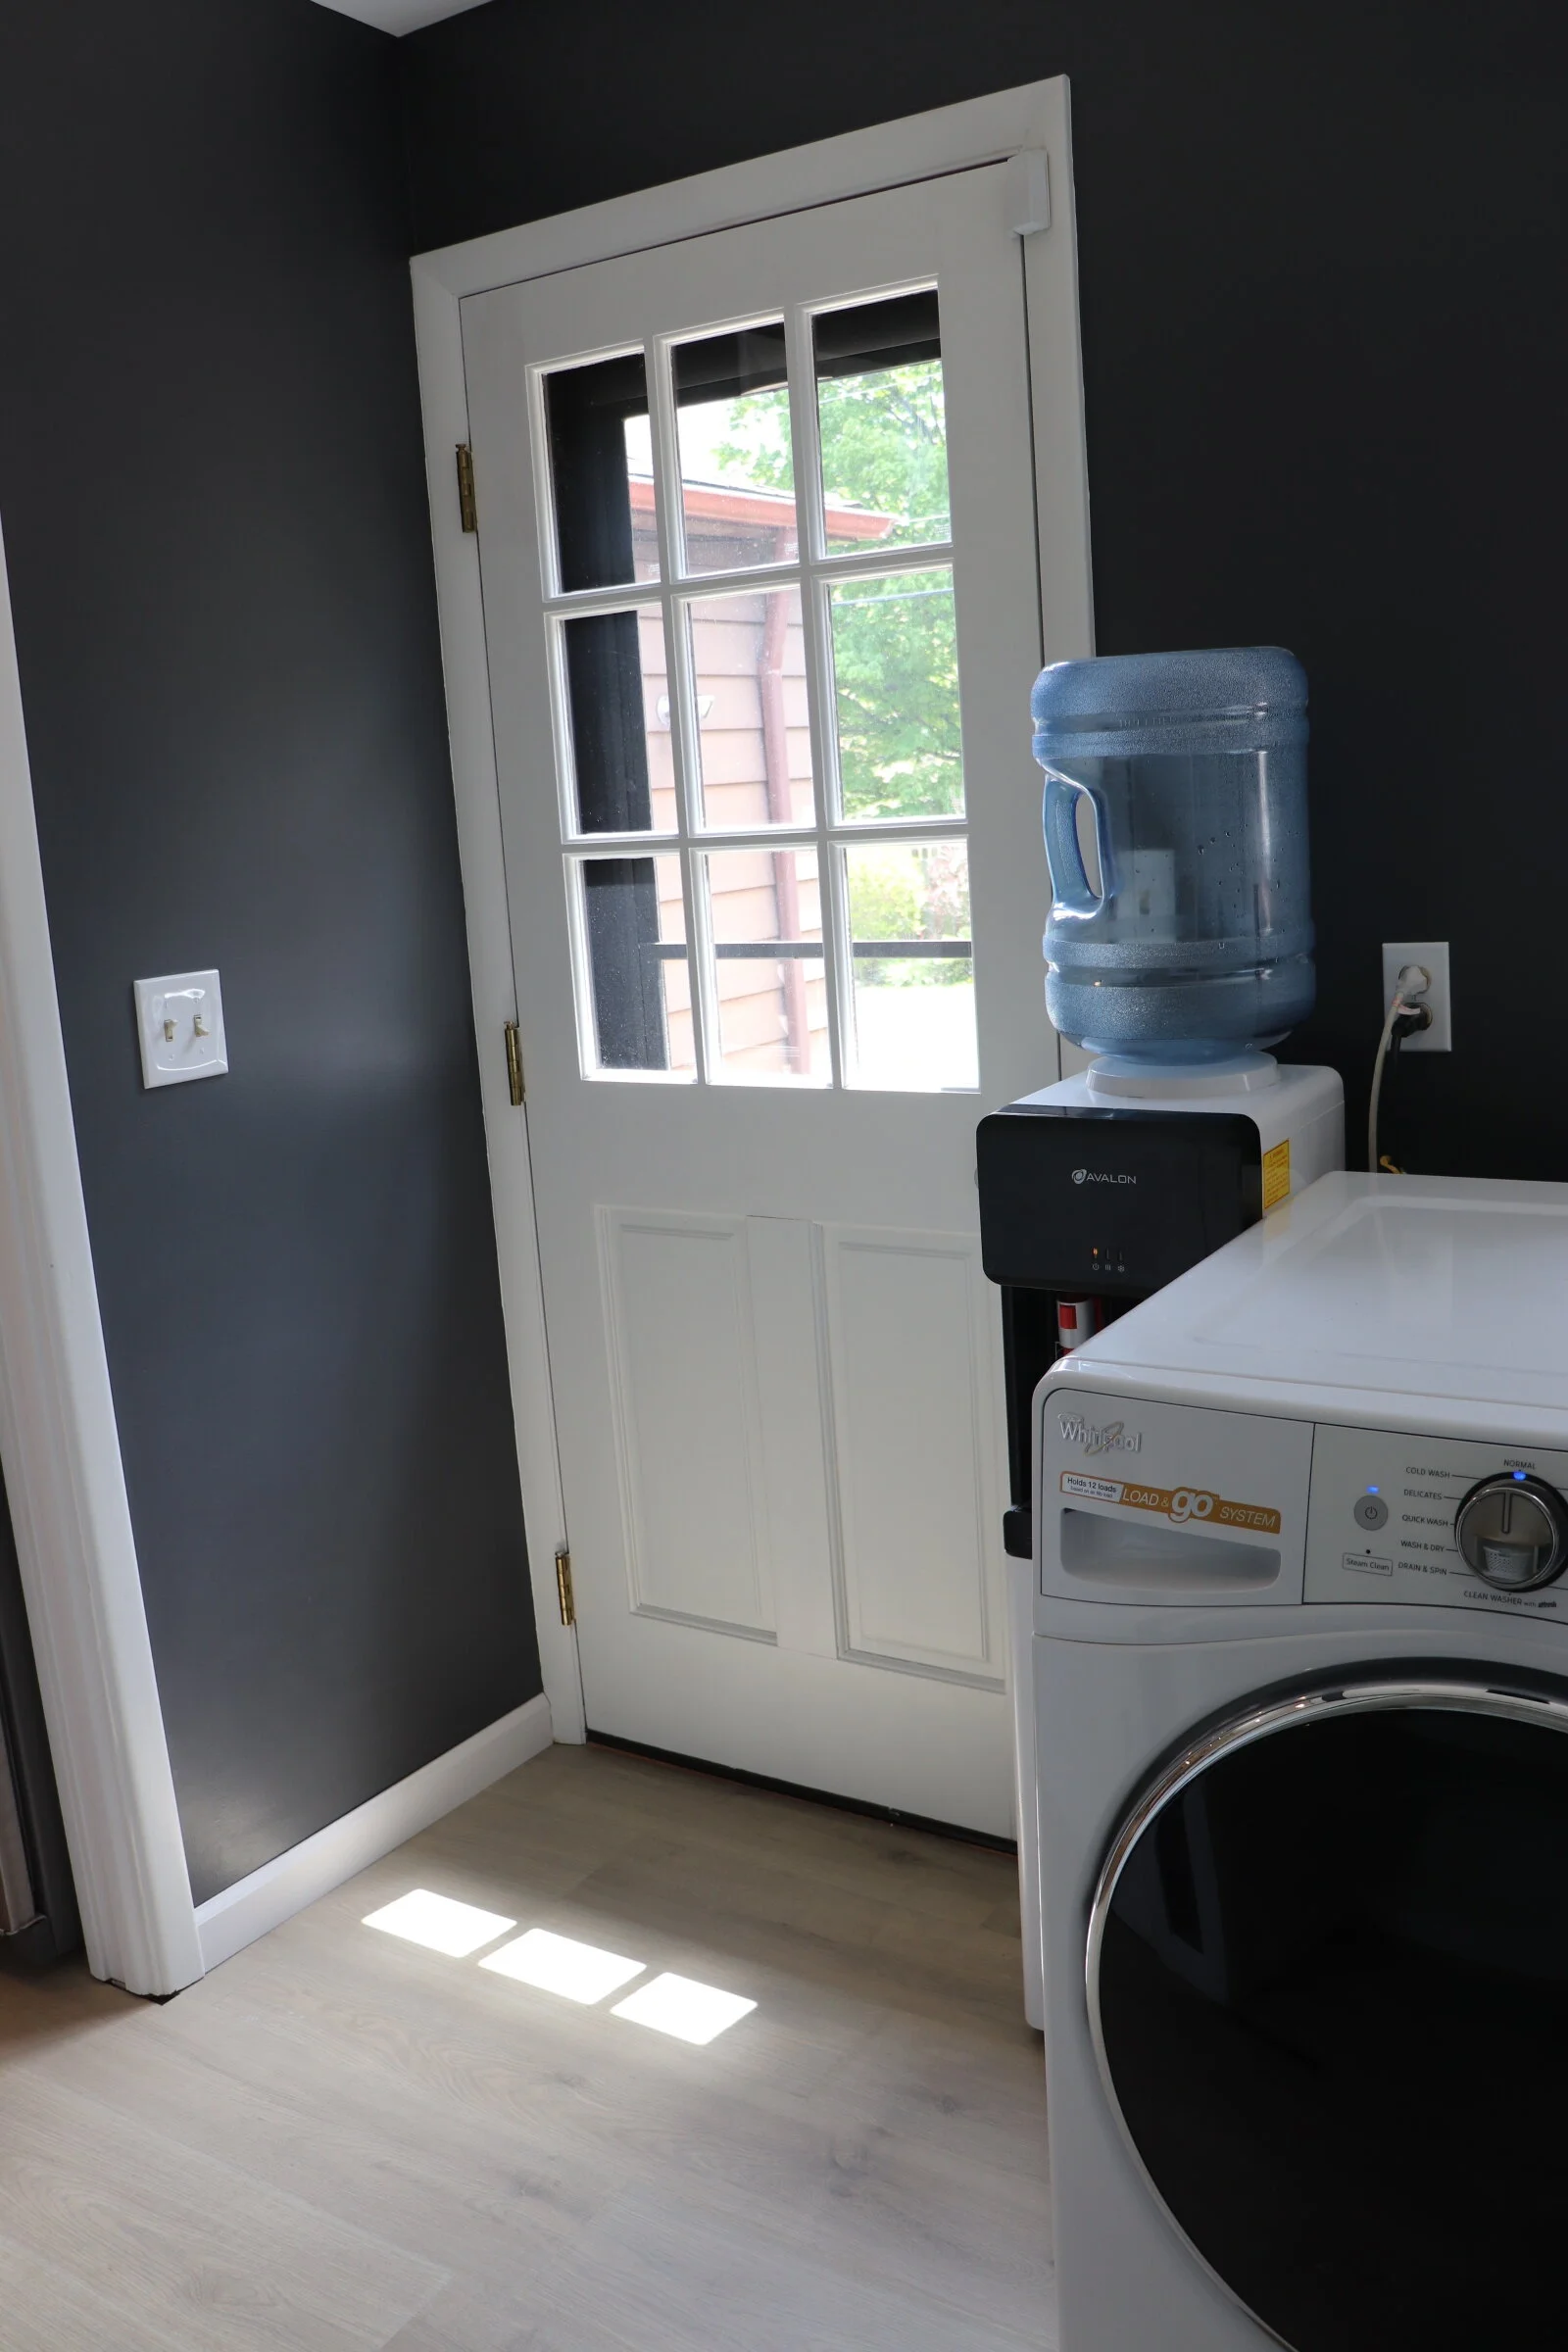
After we tore out all of the shelves, we were left with three walls that had floor to ceiling holes. And not just any holes, large holes that held anchors. So I decided it would be easier to cover it with shiplap rather than spending all the time to fill and cover the holes. (Sometimes I shock myself with my great ideas ;) ). So that’s what we did. We installed the shiplap and after about 5 trips to Home Depot, John managed to build me some built in shelves with my table top. I’m pretty happy with how it turned out and I think John surprised himself with his carpentry - win win!

Hope this post is helpful, sorry it was so long - just wanted to fill you in on how this space got to where it is. Lots of time, cursing from John, and great negotiating on my part. Let me know if you guys have any questions on the process - I’d love to help if I can! As always, I’m linking everything I can!
Shop This Post