How To Paint Your Cabinets AND Tile

How To
What you need to know about painting your cabinets and tile


If you follow me on Instagram, you know that I’ve been balls to the wall with updating my kitchen on a budget. When we moved into our home in January I knew that the kitchen needed some updating. I also knew that this was by no means my “forever kitchen” but with everything else we wanted to do in the house, a full remodel wouldn’t happen in the near future.
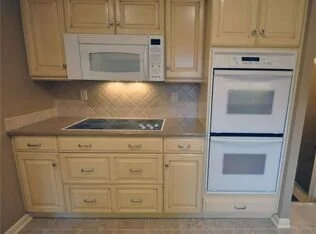
So I decided to paint the cabinets. As you can see in the before pictures they’re a weird yellow color with some painted “distressing”. AWFUL. They’re newer but I wanted them white. We have a lot of cabinets so I had to do them in three sections. We started by removing the doors off the cabinets and priming them. I used Sherwin Williams Pure Bond Primer. This stuff is incredible and will work on just about any surface. Our cabinets are wood but they were already painted so we didn’t need to sand ours. However, if yours are wood, you might want to consider it so you can get the wood texture off of them (unless you want it to be visible).
I used one coat of primer on both sides, and then moved onto paint. We used Sherwin Williams Pro Classic in the color Pure White. I debated between that and Alabaster, which is a little more off white. Each side required 2 coats each. I’m not gonna lie, it was a bitch painting them all, but be patient because it will all pay off in the beginning. In between waiting for the coats of paint to dry I painted the inside cabinets. We didn’t paint the inside because they were a very light wood. I definitely would’ve if it was dark. After the paint dries (overnight) you’re all set to hang the doors back up and enjoy your new view.
Painting the Tile
For the tile, I used the same primer as the cabinets. I then painted them with Sherwin Williams All Surface Enamel Oil Based Gloss in the shade Snowbound for their glossier finish. (Note: if you use this paint make sure to use a paintbrush that is specifically for oil based paints.) I then went over the grout with a white grout pen. Easy peasy!
Next Up: Replace floor and switch out all of the hardware!
If you do any of these projects tag me on Instagram - I love seeing all of your hard work and transformations!


